When I first started working with Terraform I was overwhelmed by the myriad possible configurations. Terraform has been around for over 10 years which is plenty of time for configuration standards and practices to shift which can confuse newcomers looking to separate the wheat from the chaff.
In this post we’re going to step through the components of a very simple deployment to Azure from your local device. Make sure you’ve run through my setup guide - Preparing to work with Terraform and Azure for the first time first to get everything ready to rock.
What does the deployment process look like?#
This is a standard Terraform deployment flow. The first order of business is always going to be authenticating to the target cloud provider (Azure), and then executing several Terraform commands (which we’ll step through in more detail later).
flowchart TB
    A["az login"] --> B["terraform init"]
    B --> C["terraform plan"]
    C --> D["terraform apply"]
    D --> E["Infrastructure created"]

    classDef azure fill:#085FAD,stroke:#003B70,color:#ffffff;
    classDef terraform fill:#623CE4,stroke:#3A1E9E,color:#ffffff;
    classDef deploy fill:#05A000,stroke:#3A1E9E,color:#ffffff,font-size:18px;

    class A azure;
    class B,C,D terraform;
    class E deploy;
Opinions are like..#
Everyone is going to have an opinion on how to do Terraform; over time you’ll gain enough experience to figure out your own path. Don’t worry about things being perfect (whatever that means), just get stuck in and practise.
That said, the HashiCorp style guide is worth reading - there’s a lot in there so pace yourself.
Making your first Terraform files#
When Terraform executes it will process all of the Terraform files within the working directory in one go. Individual *.tf files cannot be processed selectively.
We’re going to step through creating the following five files within the working directory you set up in part one of this series.
The contents of the following files could be merged into a single file and it wouldn’t change how it functions - splitting the concerns into different files is just a management/style choice.
terraform.tf#
Don’t worry about the contents of this one for now; we’ll cover this another time.
providers.tf#
Terraform has thousands of providers which are simply integrations with particular systems or software. For our use case, we’re targeting Azure, so we need to declare the azurerm provider.
Don’t worry about this file too much for now; we’ll review it another time.
main.tf#
main.tf is usually the ’entry point’ which contains Terraform resource blocks that declare what resources to create in the targeted Azure subscription. In this example we declare that a resource group should be created.
To quickly break down a resource block:
| Item | Meaning |
|---|---|
resource | Starts to declare a Terraform resource block |
"azurerm_resource_group" | The resource type to deploy (azurerm provider resources) |
"this" | Resource name of your choosing, used when referencing its properties |
{ ... } | Everything inside are the attributes (arguments, properties, etc.) |
variables.tf#
Variables allow you to run the same Terraform code multiple times and pass in different values for each deployment. For example, you might deploy to multiple regions: location could be uksouth in one deployment and ukwest in another.
To quickly break down a variable block:
| Item | Meaning |
|---|---|
variable | Starts to declare a Terraform variable block |
"resource_group_name" | The variable name of your choosing |
description | A useful explanation of the variable to assist others (and future you) to understand its purpose |
type | The data type of the variable such as string ("some string"), number (23), bool (true/false) |
locals.tf#
Locals is a special block when you can create and assign new values that aren’t declared using a Terraform variable block. Where variables have to be declared before deployment can begin, locals can be set during the deployment which makes them super useful.
A quick example might be creating a computed resource name based on multiple variable inputs:
locals {
    "resource_name" = "${var.prefix}-${var.resource_type}-${var.suffix}"
}
which you can then reference elsewhere in the Terraform code using local.resource_name. We’ll go into this in more detail later, but if you ever need to make some on the fly values you can do so in this wonderful block.
outputs.tf#
Outputs capture what information should be returned after a deployment. In this example we output the name and resource id (which are fairly common things to output).
To quickly break down an output block:
| Item | Meaning |
|---|---|
output | Starts to declare a Terraform output block |
"resource_group_resource_id" | Output name of your choosing |
value = | Every output block must have this; this is where the value of the output is defined |
Make rocket go!#
Make sure the account you are authenticating to Azure with has the Contributor or Owner role on the target subscription. You can view role assignments within the Azure Portal under the
Open up your shell of choice and change to the root of your working directory.
First, log into Azure with the az login command and follow the prompts to select your target subscription. az login has changed login behaviour several times over the years, so I’ll avoid any specific advice.
Once logged in, you can verify which subscription you are connected to using az account show and look at the value of id (copy this somewhere, as we’ll need it later)
List subscriptions with az account list. Change subscriptions with az account set --subscription <subscription id>.
terraform init#
The first of the three Terraform commands you will run is terraform init, which prepares the workspace so we can proceed to the plan and apply commands. This command does not deploy resources, and it is safe to run multiple times. Run terraform init now if you haven’t already done so, and make sure you are in your working directory where the *.tf files are.
Additional information can always be found in the HashiCorp docs.
A successful terraform init should output something like this: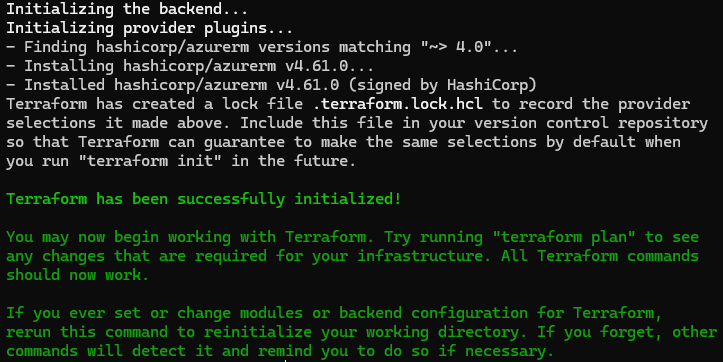
And some new content, a .terraform directory and .terraform.lock.hcl file should appear in your working directory.
terraform plan#
A terraform plan operation attempts to inform the operator what will change if this Terraform code is deployed. The plan operation is not always perfect and has its quirks which you’ll discover over time, but for this deployment it should be accurate.
The plan will read the current state of remote resources (already in Azure), compare the current configuration (the Terraform in your working directory) to the state file, and tell you what it thinks will happen when you run a terraform apply.
We’ll explore the state file in another post. For now, think of it as a representation of your deployed resources which Terraform uses it as its ‘source of truth’.
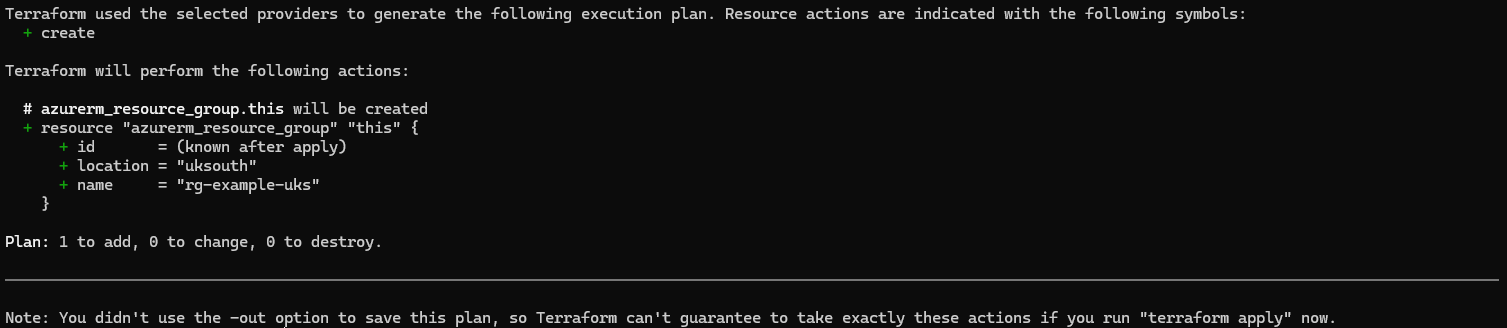
Run terraform plan in your shell now - you’ll be prompted to enter values manually for the variables we declared because they do not have default values; use the following values:
resource_group_name->rg-example-ukslocation->uksouthsubscription_id-> paste your Azure subscription id here (can be obtained by runningaz account showand copy theidproperty)
A successful plan operation should look something like this:
terraform apply#
It’s time for terraform apply. Run this in your shell and provide the same values as before for resource_group_name, location, and subscription_id. Make sure you have your Azure Portal open to check the resources.
You’ll see a new plan displayed and also be prompted to confirm the deployment by typing yes. This approval step can be removed by adding the --auto-approve flag to the terraform apply command.
A successful apply operation should look something like this:

Although subscription ids are not secrets, they do expose information about your tenant and it’s generally a good practice to avoid putting them in public places.
Because this is a local deployment, you should see some new files in your working directory called terraform.tfstate and .terraform.tfstate.lock.info. Ignore these for now. Generally, it is not a good idea to modify these files manually; there are specific commands and processes to use if you need to alter state files (which we’ll cover another time).
Wrap up#
And we’re done! You’ve just completed your first Terraform deployment to Azure. We’ve gone through the essential steps of deploying infrastructure using Terraform, starting with authentication via az login and identifying the three critical commands that make up every Terraform deployment: terraform init, terraform plan, and terraform apply.
Key concepts to remember: Terraform processes all .tf files in your working directory simultaneously, variables enable reusable configurations across different deployments, and the state file (terraform.tfstate) tracks your deployed resources. Now that you have a working deployment, try creating a few additional resources such as a storage account or virtual network! Don’t forget to check the resource pricing if you’re unsure what kind of cost is associated with it.
I hope this has been useful, in future posts we’ll explore more aspects of Terraform as I understand them. Until next time, stay curious.